Feeds:
Posts
Comments

Archive for the ‘Crafts’ Category

One of the blogs I’ve been following for quite some time now is the Sew Mama, Sew! blog, affiliated with the online fabric store of the same name. In fact, it was through their semi-annual Giveaway Day that I first got drawn into the world of blogging, as I wrote about here. Currently they’re running a contest on handmade tablescapes, and I figured it was just the incentive I needed to get off my duff and write a little more about some of the DIY details of my wedding. For those of you new to my blog, you can read more about my September wedding here, here and here. Without further ado — a look at our wedding tables:

Cabbage roses, herbs, and light shades of brown (burlap, kraft paper, linen) were the name of the game.
The wedding table

Some of the elements that we wove throughout our wedding decor were herbs, chocolate, art deco vintage, DIY, typewriters, and local food.Place settings

DIY item #1: Embroidered table numbers. We had three long tables, with two to three embroidered table numbers on each, set on a stack of art deco style vintage books for height. The flowers on the embroidery were motifs that I copied from the Liberty of London fabric I used as backing for our ring pillow (as well as scanned in and printed for envelope liners). I also used Liberty fabrics to cover clothespins for our photobooth display.
Embroidered table numbers

Another embroidery example below. I originally intended to cover the entire number with a satin stitch so it was opaque, but I ran out of time! (I finished embroidering an hour before the rehearsal dinner — lucky for me, I find embroidering a great way to sooth jitters…)
Embroidered table numbers

DIY item #2: Paper bees. Quick and easy DIY! I simply bought a bee punch and stamped a bunch of paper bees out of a local food magazine (Edible Boston), in keeping with our local-food themed dinner. We nestled a bee into a sprig of rosemary on each napkin (we got married at an herb farm).

Napkin Accents

We then bought a bunch of bulk herbs and potted them in terra cotta pots for table decorations — a different herb for each table. The symbolic meaning of each type of herb used was written out on the back of the ceremony programs along with a list of guests and corresponding tables.
Potted herbs

DIY #3: Stationery items. My amazing stationer, Helen at Papier Lapin, designed our invitations using kraft paper and typewriter fonts. How thrilled was I when I found a supplier of the EXACT same kraft paper she used, and was able to download the same fonts for free online? Using her invitations as a style reference, I made hang tags for place cards with kraft cardstock, kraft reinforcements, and green butcher’s twine. We tied each one to a cookie and used them as combo place card/favors.
Place card/favors

Again, using the invitations as a style guide, I designed and printed up menus to be placed underneath the favor/hang tags.
Menu

And bless my best friend, who not only got her fiance to brew beer for our entire wedding, but who also downloaded the same fonts and designed labels for the beer using kraft sticky labels.
Untitled

I was shocked when I learned how much vintage blue mason jars cost… Luckily I found a tutorial online to do a faux blue finish using a thinned glass paint. The jar pictured here is actually a Classico spaghetti sauce jar! My then-fiance and I ate a lot of spaghetti and pickles leading up to the wedding to amass enough jars for centerpieces 🙂
DIY faux mason jars

And a final look at the whole table — pickle jar front and center!

A look at the finished table

I loved the way everything turned out…especially the part where we said “I do.”

Read Full Post »

Banana Pants!

Untitled

I know…they don’t look like bananas.

There aren’t any bananas on any of the fabrics…

You can’t eat them…

But there’s a little monkey that goes inside of them!

mosaic2

It’s hard to believe but my little niece (aka “The Banana”) turned one this summer. To help celebrate, I brought her an excessively large chocolate cake and whipped up a pair of Quick Change Trousers from Anna Maria Horner’s book, Handmade Beginnings.

Overall, I was very pleased with the pattern. Because they’re reversible, they are, by nature, fully lined. The finished product appeared to be of very good quality, so check plus for that. No problem following the instructions, and no errors in the pattern (which, unfortunately enough, has become so common in many craft books, that it needs to be called out as a plus!). It contained some nice details like topstitching, and well, the fun colorful butt patch, of course.
IMG_6333
IMG_6334
Even better, no odd puckering of the crotch — hooray! (And seams that almost meet…)
IMG_6335

I’d say my only complaint is that they came out a bit small, particularly around the diapers (cloth diapers would not fit — no way, no how). I made the 12-18 mo size, and I’m guessing she’s already not fitting in them now at 15 mo. Another word to the wise is that because they are fully lined, they’re probably a bit heavy for summer pants. With fall upon us rather suddenly, I guess this just means I need to get cracking on a bigger pair!

Once they were all sewed up and the obligatory photo shoot done, I then wrapped them up in a tourist map of our old hometown, some leftover library cards from my wedding guest book, and a stamp of the Uncommon Fenwick from Mystic Forest Dwellers.
for a special girl

But really. As much as I think the pants are pretty cute and the wrapping job spiffy, there is nothing cuter than the pants ON The Banana.

Untitled

Gah! She’s so cute, she just slays me.

947e98db-5570-415e-91fc-62e72b3aeab0

Bye, bye, Banana Butt!

Linking up to Craft Book Month at Craft Buds.

Craft Book Month at Craft Buds

Read Full Post »

The good folks over at Quokka Quilts are running a fun contest in conjunction with Fat Quarter Shop. Check out the complete details here, but the long and short of it is that you create your own custom fabric bundle to include three solids and twelve prints, then the judges will pick their favorite to win a half yard bundle. I thought it sounded like a good challenge for the eye, and after spending several hours (yep, hours), had my suspicions confirmed. This was hard! What added to the challenge was the sheer volume of choices (Fat Quarter Shop’s inventory is huge). How do you start? Well, here’s what I did…

I started off by opening up a PowerPoint doc and pulling in images for a whole bunch of prints I liked from the shop’s modern fabrics section. That quickly got overwhelming, so I decided to pick a few key focus prints that I loved and knew I would want in the final selection:

n

j

b

From there, in a new slide, I pulled in a bunch of solids to get the overall color scheme/proportions of major colors to accent colors that I was looking for:

Slide2

What followed was many hours of pulling in additional prints I liked, swapping out different solids and colors to get the appropriate balance of color, scale, value and design. I also made a concerted effort not to include multiple prints from any one given line. I won’t even tell you how many iterations I went through before ending up with my final contest entry. I mean, really, isn’t this enough to make your head spin? It’s like playing Where’s Waldo with fabric!

options

Those of you who know me in real life will no doubt not be surprised at my final collection. I like to think of it as jewel-y, earthy, with a 70s influence. Which, in my ideal world, is how I like to dress. (Curious? Check out my Pinterest fashion board). Without further ado, here’s my final collection:

mosaic27c3873fbad9eea624992cb330f6ae0267105ccf

  1. Kona Cotton Hibiscus
  2. Ruby Cotton Lime Dot
  3. Dazzle Clementine Shadow Stripe 
  4. Bespoken Aqua Stitchery
  5. Domestic Bliss Aqua Time For Tea 
  6. Stitch Organic Lagoon on Brown Loop Stripe
  7. Oval Elements Chocolate Cherry
  8. Outfoxed Brown Wild Vines
  9. Power Pop Coffee Confetti 
  10. So Sophie Purple Dot
  11. Kona Cotton Jade Green 
  12. Pam Kitty Morning Green Plaid
  13. Sophie Chocolate Houndstooth
  14. Pure Elements Verve Violet Solid 
  15. Pear Tree Cream and Orange Allover Eggs

There were many other prints that I toyed around with and also liked very much; here are some of the second place prints that came *this close* to making it into the pile:

Slide4

(edit…2 of the solids made it in after all! Took this shot while the espresso was still in the final running instead of the teal/purple…)

And for good measure, here are the true rejects (still prints I like, just not working with the theme I was going for):
Slide1

That’s all for today, but expect more posts soon — I have so many fun things to share…crafts, holiday food, the Boston to Austin food swap… Stay tuned!

Read Full Post »

Giveaway winner…

Thanks to all who entered this week’s giveaway! The winner is…

# 28, Jessica C! I’ve sent you an email, Jessica; just drop me a line and let me know where to send your package. It looks like Jessica has named our little sheep friend Leonard (which also happens to be my grandfather’s name!). For the curious amongst you, the name I had chosen for the sheep was: Norbert

Believe it or not, there was one person who guessed the name Norbert, so Georgia got a second entry into the draw.

This was too much fun, and I loved reading all the names you came up with — you are a truly funny group of people! Back to some holiday stitching for now… much more to share very soon!

Read Full Post »

IMG_5795

IMG_5802

IMG_5803

Happy Halloween, all! Pattern by The Green Hedgehog, sewn with love for Baby W by her Auntie, The Hungry Crafter.

IMG_5776

IMG_5777

While I was sewing for Baby W, I took the time to make a couple of paci clips that match her Mom’s diaper bag. Knowing nothing about babies (and therefore nothing about pacifiers), I was grateful to be forewarned that Baby W is partial to the “soothie” style pacifier and therefore needed a special loop to attach to it. A quick internet search turned up this tutorial, which did the job quite nicely. Super quick and easy — I see making plenty more of these in my future!

IMG_5785

Read Full Post »

Pink Chalk StudioI’ve been meaning to share my sewing space with you all for a while, and was finally given a shove by Kathy over at Pink Chalk Studio, who has dubbed July “Where I Sew” month on her blog. Be sure to check out the link up page over there for all your voyeuristic pleasure!

Someday, I hope to have a single studio room dedicated to all my creative affairs. Right now, things are a bit spread out, with “fine arts” (paints, pastels, etc.) and paper crafts living in the upstairs office along with the musical instruments, computer and graphic design books, while the sewing, embroidery and fiber arts live downstairs in a nook of the living room. Given that a). this is “where I SEW” month, and b). the office is so cluttered you could lose a leg walking through there, I think I’ll stick to my downstairs corner for the purposes of this post.

I’ll begin by introducing you to my torso. She doesn’t have a name (suggestions welcome! Shout ’em out!), but I think that’s only because I relish the opportunity to use the word “torso” in conversation.  As in, “What’d you get for Christmas this year, Jo?” “A torso.” Unfortunately, she celebrates her birthday every year by being relegated to the garage so that there’s room for the Christmas tree. The joys of townhouse living.

IMG_2973

And here’s the nook in its entirety. Lovely spot for a Christmas tree, don’t you think?

IMG_2968

Over to the left, you’ll notice the bulk of my storage in the bookcase: craft books and knit fabrics on the top shelf; quilting cottons and linens below; a display shelf of my favorite odds and ends; patterns, notions, rulers and the like in a vintage tool caddy; baskets for embroidery floss, wool roving, and felt; and finally, tucked away in the bottom, the unattractive bags of batting, interfacing, polyfil and scraps.

IMG_2939

I picked up a couple lime-painted metal drawers at the same time as the tool caddy, and keep them on my sewing table to hold scissors and pins and rulers and marking pens, as well as my favorite sewing accessory ever: Owly. Yes, I am still five years old when it comes to naming conventions. I had better not ever seriously get into creating large art quilts, for fear of what I’ll name them. But back to Owly. Clearly, he’s a pincushion. His secret, though is that he’s also a tape measure. His tail pulls out, and you press his base to retract. Such fun!

IMG_2978

To the right of the sewing table is a small bookcase where I store my apparel fabric and some additional patterns and books. On top of the bookcase is a lamp, excess spools of thread (long story), and a great bulldog print by Marc Tetro that I picked up on vacation in Asheville, NC. Again, no small children in my house, just a big one that has a thing for goofy animal art. (You did notice the strings of Mexican chickens hanging from the wall in the first two pictures, right?)

IMG_2972

And that just about does it! Not much to my nook, but it’s bright, cheery, and gets the job done. Oh wait, before I sign off, how about some Christmas in July?

IMG_4657

Told you it looks good there. Hope everyone had a great fourth of July. Merry birthday, America.

IMG_4529

Read Full Post »

Marcy's Calendar

Today we bring you a long overdue post regarding a CHRISTMAS craft — perhaps I need one of these fabulous handmade calendars of my own to keep me up to date? Oh wait… Is deeming it “fabulous” too self-congratulatory? Well, I picked a pattern and fabric that I personally loved, so perhaps not. (Not to get too philosophical, but really, how much creative credit can I take when using someone else’s pattern and fabric line? And the fabric and pattern are truly fabulous.)

The calendar was a gift for my friend Marcy, so I tried to pick colors that would go with her house. Let’s take a quick look, shall we? The pattern is from Rashida Coleman-Hale’s book, i {heart} patchwork, and the fabric is from the Paradise line by Pat Bravo for Art Gallery Fabrics, which I ordered online from Pink Chalk Fabrics.

IMG_4551

I did sneak in a few fabrics from outside the Paradise line: a Heather Ross snail — hello, day 1! — and the blue checks from my stash.

IMG_4540

The linen was also from my stash (ordered from Japan by way of Etsy, I believe), and I used a kiwi colored thread for quilting that I happened to have on hand for the shirt that shall not be named (nor completed, to date).

Marcy's Calendar

I decided to add a tag made with a rubber stamp (also from Japan-upon-Etsy) and leftover linen twill tape from the month tags. The back side was lined with a single piece of the blue squares & dots print.

IMG_4575

Moving on to my thoughts on the pattern itself:

  • For the grommets, the book calls for 1 extra-large 7/8″ grommet. After searching in vain online for a somewhat unreasonable amount of time (as I tend to do when stubbornly fixated on one mission or another), I finally e-mailed Rashida herself as a last-ditch effort (concede? NEVER!!!). She was fantastic! She wrote me back right away, and clarified that it should be 7/16″. Phew. Now THAT size I could find no problem. Plus I got to feel like I had another run-in with sewing celebrity, so it was all good. Do check out her blog, aptly named i heart linen. (For that matter, go buy her book — while this project was my favorite, there are several other great patterns in there that I can’t wait to make.)
  • As a matter of personal preference, I found that 11″ of cording, once doubled over, was too short. So I eyeballed it to a length that appealed, and called it a day.
  • I should also add that, having visited said calendar this past weekend, the top corners are now starting to curl, which is a bummer. So I might consider doing 2 grommets on the corners instead and/or add some heavyweight interfacing.

Marcy's Calendar

  • Another modification I made was in regard to the last few buttons. The calendar grid is set up to accommodate five Sunday-Saturday “weeks” in a month; however, as conveniently illustrated by the month of January 2011, there are months here and there that actually span six S-S weeks. What’s a girl to do? Get crafty. I calculated that there were really only three days that had the potential to be problematic — the 29th, 30th, and 31st. Not wanted to cause redundancies for months that didn’t span six S-S weeks, nor wanting to extend the calendar grid to accommodate another week, I simply made three extra buttons, so that in addition to the standalone 22nd, 23rd, and 24th, I also had optional 22/29, 23/30 and 24/31 buttons. Problem solved.

IMG_4539

  • And here we have an action shot (woo hoo!) of the Velcro buttons. Another pattern modification here: the pattern calls for 35 Velcro coins for the buttons. Which is all fine and dandy for the calendar base, which does in fact have 35 spaces and therefore 35 Velcro hooks to be sewn on, but you’re also making 7 small linen buttons and 31 larger print buttons: 7 + 31 = 38 Velcro loops. If you want to make the 3 dual-day buttons, you’re up to 41. In other words, play it safe and buy extra.

IMG_4543

  • To store the extra buttons and month labels, I simply grabbed an organza jewelry bag and tucked the extra pieces in.

Marcy's Calendar

All in all, a very fun project to work on. I loved doing the covered buttons, and had fun playing with stamps and glue in addition to the standard sewing. It was hard to give this one away! Check out my Flickr set for more pictures.

Read Full Post »

IMG_4791

Ahem. If I can draw your attention away from that beautiful photo for a minute, I’d like to take a minute to express my gratitude. On February 16, my little blog turned one year old. Time indeed flies. A year ago, I really knew nothing of blogging. Oftentimes, I suspect I still don’t…

In typical fashion, I threw myself into my new interest in a — dare I say? — obsessive manner. I spent the grand majority of the past year learning as much as I could about blogging, bloggers, social media, online networking and the like. I currently follow 128 blogs, of which about 90 are sewing related, 20 food, 10 wedding, and the rest philosophy/art. I’ve learned quite a bit with this daily reading (and yes, I read each post!), but as you can imagine it takes up a good chunk of time. At the same time that I was stashing away information, collecting recipes, tutorials, and inspiration, I also began working on building my own little fabric stash. Point being, I have been preparing. For a year. I think I can quite safely move out of “data collection” mode and into action, yes? My goal for the upcoming year, then, is to read less, do more.

Before I can turn the page on last year, however, I have two orders of business to take care of. First, back to that beautiful box of fabrics…do you know what that is? Those are, quite literally, the spoils of reading 128 blogs! As any of you who follow craft blogs regularly are well aware, a perk of reading craft blogs is the phenomenon of the giveaway. Giveaways, giveaways, giveaways. They’re everywhere! And I’m grateful to report that everything in that picture was won on various blog giveaways over the course of the past year. I wasn’t able to bring myself to cut into them until I had them properly documented, thanks were given, and I spent enough time just sitting around looking at them. So let’s do that so I can use them! Wanna look at them too?

The first giveaway I ever won was this charm pack of Punctuation by Sandy Klop for American Jane. Many thanks to Heather from Mountain Home Quilts.

IMG_4831

Shortly thereafter, I won the following fat quarter by my favorite fabric designer ever, Anna Maria Horner, in home deco weight from her Drawing Room collection. Thanks to Jenny from Stumbles & Stitches. Jenny, I may need your expertise, as I’ve been commissioned to make a Dad Bag myself for my brother-in-law!

IMG_4819

In a fun giveaway from Sarah at Stash Resolution, I got to pick my own selection of 6 fat quarters from Sarah’s new Etsy shop, Swell Cloth. It was hard to narrow down the choice, but I ended up with the following gorgeous mix of fabrics, including some Joel Dewberry, Heather Bailey, and Bliss by Bonnie & Camille. Thanks, Sarah!

IMG_4813

Back before the holidays, Kelly at Stitch-n-Lounge gave away this great collection of green and pink fabrics from the Sweet Broderie collection — perfect for a mod holiday project. Now that the holidays are a distant memory, I’m starting to reconsider, and am thinking of how cute these would be in a project for my baby niece due in June, thanks to Kelly.

IMG_4803

Food blogs do in fact do giveaways as well, if a little less frequently. The way I look at it, most food blogs are doing giveaways in the form of a recipe on a daily basis! I won a whole collection of recipes from Lara over at Good Cook Doris, another local Boston blog. Now, the intent is for Mr. Manly to use this to book to cook food for me, but… well, I think we’ll both be happier if I hoard the cookbooks and he sticks to eating all the leftovers. Many thanks, Lara!

IMG_4807

During the December Sew Mama Sew Giveaway Day, I was super excited to find out I had won a bundle of fat quarters from Mo Bedell’s Party Dress line…from Mo Bedell herself! My goodness. I’m still slightly awed by my run in with fabric celebrity. Thank goodness my sister is having a girl, because these are gonna make some darling baby things. Much gratitude to Mo.

IMG_4798

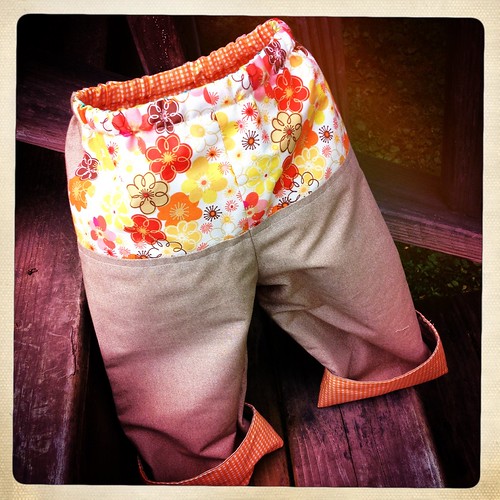
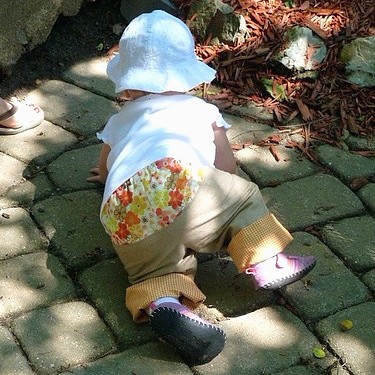
Most recently, during Aimee Ray’s Doodle Stitch Along hosted by Lark Books, I won a copy of Aimee’s latest book, Doodle Stitching: The Motif Collection, along with a pair of embroidered napkins that were photographed for one of the projects in the book. Those will most definitely be staying on display for a while! Scroll down a couple of posts to see some of the pieces I embroidered using her patterns — there’s an entire woodland motif section, so I can’t wait to do more! Thanks to Aimee, and be sure to check out her gorgeous blog, little dear tracks, for more embroidery fun.

IMG_4836

(As an aside, please feel free to compliment me on my artistic use of the blur feature on Piknik to fade out the massive cat hair that was ruining my otherwise nice picture of those oh-so-white napkins. Jo: 1, Zoe: 0)

Finally, I won a $5 credit to the Yummi Designs store on Etsy, which I’m putting towards this awesome little clutch. Thanks Alycia, and thanks to Kirsten and Jordan at kojodesigns for hosting the giveaway!

And in the spirit of giveaways, just wanted to say hello to Kim of Pokeytown Kim, the winner of the apron, fabric, and buttons giveaway I did back in December. A former South Shore gal like myself, Kim is now in snowy New York and is a very talented quilter and sweet lady.

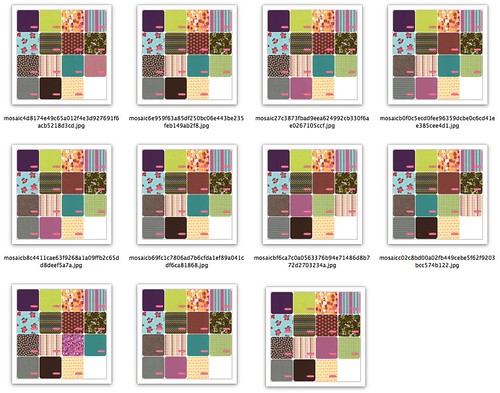
Wasn’t that fun? On a related note, I really enjoy sharing fun finds, blogs, tutorials and the like with people who will appreciate them. Translation: I annoyingly spam my friends’ and family’s inboxes with hyperlinks on a regular basis. I recently got an invite to join Pinterest, and am totally hooked! Basically, Pinterest works like a virtual pinboard, where you can store all your bookmarks, but see them as photos. For a visual person like myself (who generally operates under the “out of sight, out of mind” principle), this thing is genius. I already have my recipes covered with Recipe Nut, and will stick with that for food, but Pinterest is already fantastic for tutorials and wedding inspiration. You can find me on Pinterest here; joining is by invite only, so if you’d like to join, just drop me a line and I’ll be happy to send you an invite. Here’s a sample of what one of my pinboards looks like:

Now for that second and last order of business before I can move into my second year of blogging. You didn’t think I’d just gloat about all the giveaways I’ve won without giving a little something back to the universe, did you? See, I’ve had the hankering to make cookies. Like many a soon-to-be-bride, however, I’ve unfortunately found myself on a diet for the past few months (SHHHH! The Hungry Crafter on a diet? Say it ain’t so!?!?) So, my question is: is there anyone out there who might like to help me eat cookies? In celebration of one year of blogging?

Leave me a comment below, and I’ll figure out some random way of fairly picking a winner to get cookies made by me. In fact, the winner can even take their pick of any cookie/bar in my recipe box over on Recipe Nut. Or roll the dice on “chef’s choice.” It’s up to you. You deserve cookies. And I deserve to eat one or two before packing them all away and shipping them off to you to ensure no further cookie temptation remains in my house. Sound like a plan? Oh, let’s put an end date on this — I’ll pick a winner on Sunday, March 6th. Happy new blog year, y’all. I’m looking forward to it.

Read Full Post »

Doodle Stitchalong #2

Motif #2 from the Doodle Stitch Along! This week’s motif was “Woodland Children,” although I found myself thinking of them as Hansel & Gretel. Other fellow stitchers went with Little Red Riding Hood & the Hunter, which I suppose works as well. What do YOU think?

I was also flattered to be featured as one of four samples on Aimee’s blog, Little Dear Tracks. Be sure to check it out if you’re enjoying the embroidery designs. And if you’re not — well…there’s only 2 more weeks ;). Then it will be back to food as usual.

Read Full Post »

IMG_4733

Just a little something to tide you all over while I work on a couple larger posts! I decided to jump in on Aimee Ray’s Doodle Stitch Along. Total instant gratification project — I started last night and finished up this morning.

Happy long weekend to all!

Read Full Post »

Older Posts »