Feeds:
Posts
Comments

Archive for the ‘The Spaghetti Capers’ Category

This post is part of an ongoing series on Italian cookery, affectionately known as “The Spaghetti Capers.”

IMG_3537

You may remember that I previously professed my love for Barbara Lynch, with promises of more posts to come. I don’t remember when I first took a special interest in her career — I want to say it was after Sportello was featured in Saveur magazine, and I learned of her Italian venture? I was already an avid fan by the time she was featured on the cover of the Boston Globe magazine (great article — I encourage you to read it!); and was therefore thrilled when I stumbled across her segment on the Cooking Channel where she walks the viewer through the recipe for Ricotta Gnudi.

Ricotta Gnudi! What, you may ask, is ricotta gnudi, anyway? From what I’ve read, gnudi is, much like it sounds, the Italian word for nude. Can’t wait to see what kind of readers are going to stumble across my blog now that the words “nude Italian” are on here… Essentially, gnudi are akin to ravioli filling…with nothing enclosing them; instead, you roll them out like gnocchi. However, unlike gnocchi–or “little sinkers” as my grandfather always calls them–gnudi are absolutely pillow soft and light. It’s like eating happy little Italian clouds (channeling my inner Bob Ross).

The best way to make ricotta gnudi, of course, would be to make your own ricotta. My cheesemaking party plans have been stymied for the past year, however, so I was more than happy to use the fresh ricotta from Narragansett Creamery instead (see prior raves here and here).

Shall we kick off this gnudi party, then? Start by mixing together your ricotta with some flour, an egg, parmesan, salt and white pepper.
IMG_3472

Your dough will be super sticky and a little tricky to work with. This is a good thing — this is why the gnudi will be light and airy.
IMG_3473

Next, gently roll out your dough by hand into a log and cut into bite size pieces. Hard to work with = messy. This is OK. Embrace the mess. (That’s actually one of my mantras for the year…but that’s another story).
IMG_3505
Roll the pieces into balls and use a gnocchi board or back of a fork to make ridges on each piece. Note: I tried the fork method, and was highly unimpressed. I have since bought a gnocchi board and look forward to using that for future batches.

Once all your gnudi have been formed, place them on a tray and freeze them.
IMG_3509

In the meantime, start your sauce. I must say, like most Italians, I’m partial to my grandmother’s sauce. Disregard the fact that it’s actually my grandfather, not my grandmother, who is of Italian descent. Doesn’t matter. It’s my Noni’s sauce we’re talking about! That said, Barbara Lynch’s sauce is so easy and most excellent. And since the recipe is, well, a recipe and not a splish-splash of this, that, and the other, I expect I can make it with more consistent results. This may be my new go-to sauce.

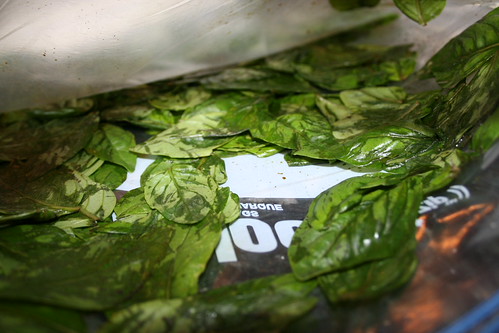
Start by sautéing your veggies in olive oil. Note that it’s killing me a little inside not to add carrots, because I always add carrots to my sauce.
IMG_3513
Next, add your tomatoes and wine and simmer.
IMG_3517
Time to cook the gnudi! Carefully lower the gnudi into a pot of boiling water; I used a slotted spoon to avoid splashing. They don’t take long to cook at all, and the cool part is that they float to the surface when they’re done — it’s like nature’s turkey timer: POP! Done!

IMG_3524

I had to cook them in batches, so I just transferred the cooked gnudi to the pan of sauce to stay warm while I cooked the rest of the batches. Nothing left to do after that but spoon into bowls, top with some fresh basil and parmesan, and enjoy. It’s so good and well worth the mess. I’ve actually got a smile on my face just thinking about them.
IMG_3534
 
Ricotta Gnudi
from Stir: Mixing It Up in the Italian Tradition, by Barbara Lynch

  • 1 lb. fresh ricotta
  • 1 c. flour + additional
  • 1 lg. egg
  • 1/3 c. finely grated Parm-Reggiano
  • 1 T. kosher salt
  • 1/2 t. freshly ground white pepper
  • 2 c. Odd Fellow Marinara Sauce

In a large mixing bowl, combine the ricotta, 3/4 cup of the flour, the egg, cheese, salt, and pepper. Use a wooden spoon to mix ingredients together well. Lightly flour your work surface and a baking sheet for holding the shaped gnocchi. With floured hands knead the ricotta mixture briefly; it will be quite wet and sticky at this point. Dump the mixture out onto your work surface.

Cut off a piece of the gnocchi dough and try rolling it into a 3/4-inch thick log. If you can’t get it to roll, add a little more flour to the dough and try again. You want as little flour as possible to keep these together so the resulting gnocchi will be light and ethereal. Cut the log into 1-inch pieces and then into little balls. If you have a gnocchi board, hold it at a 45-degree angle over your floured baking sheet and roll each ball down the length of it to give the gnocchi grooves. As the gnocchi nears the end of the board, let it drop onto the baking sheet. If you don’t have a gnocchi board, hold a fork, tines facing down, and roll the ball down the length of the tines. Repeat until all of the dough is rolled and cut. Freeze the gnudi, about 1 hour. (Because they are so soft, they are much easier to handle so do this even if you plan to use them soon.)

To serve, bring a large pot of well-salted water to a gentle boil. In batches, drop the gnocchi into the water and cook until they float, about 1 to 2 minutes. As each batch cooks, remove them with a slotted spoon and keep them warm or transfer them directly to the sauce they are being served with.

Odd Fellow Marinara Sauce
also from Stir

  • 1 T. extra virgin olive oil
  • 1 small white onion, sliced
  • 2 cloves of garlic, minced
  • ½ t. crushed red pepper flakes, plus more to taste
  • 1 (28-oz.) can crushed San Marzano tomatoes
  • ½ c. dry white wine
  • Kosher salt and freshly ground pepper
  • 2-3 basil leaves

Heat the olive oil in a medium saucepan over medium heat. Add the onion, garlic and crushed red pepper. Cook, stirring occasionally, until the onion is just tender but not browned, about 8 minutes.

Add the wine, increase the heat to moderately high and cook for a few minutes longer, until reduced by half. Add the tomatoes with their juice and ½ teaspoon salt. Simmer for 5 minutes, stir in the basil and season with pepper and additional salt, if needed. The sauce can be covered and refrigerated for up to 4 days.

Read Full Post »

What a great food year it’s been! I’ve discovered that I do in fact like fennel and chowder (and fennel chowder), learned better ways to chop peppers and onions, explored the wonders of the fava bean, eaten my first zeppoli, developed an unhealthy obsession with Iggy’s Francese bread, and forever banned Vlasic pickles in favor of Claussens. As an aside — seriously? I have been MISSING OUT for years! I had no idea the difference between the shelf-stable, ho-hum excuses for pickles you find in the middle aisles of the grocery store compared to the crunchy, tasty, lip-smacking goodness of a pickle from the refrigerated deli section! If you haven’t made this discovery yet, RUN, do not walk, to your nearest grocery store and do a taste test. May I never eat those things I used to call “pickles” ever again. Pickle rant aside…What’s the point of all this, you may wonder? On to my latest revelation: I like pesto! When it’s done right, that is.

IMG_3743

It all started with the basil, of course. After sampling several vendors, I can safely say that the Siena Farms stand is THE place to get your basil if you frequent the Copley Square Farmers Market.  For one, their bunches are big, full, and include more stems in each bunch than most other stands. More importantly, they’re the only stand I’ve found that give you the entire stem — including the root! What this means is that your basil — kept in a cup of water on your kitchen counter — lasts twice as long as a bunch without the roots.

Inspired by the abundance of basil (and emboldened by my many new taste acquisitions of the year), I decided that I needed to give pesto another shot. I do love basil, after all; it was the pine nuts that made me squeamish before. For this adventure, I knew I didn’t want to mess around. I wanted to go to a proper authority for the recipe to get the best pesto possible. In my mind, this means one thing only: the good folks over at Cook’s Illustrated. If you’re not familiar with them, they approach recipe writing like scientists, doing lab test after lab test until the final recipe is perfected. They did not let me down.

Classic Pesto

Abridged from Cook’s Illustrated, The Best Italian Classics

  • 1/4 c. pine nuts
  • 3 med cloves garlic, unpeeled
  • 2 c. packed fresh basil leaves
  • 7 T. extra virgin olive oil
  • 1/2 t. salt
  • 1/4 c. finely grated Parmesan cheese

Toast nuts in a small, heavy skillet over med heat, stirring frequently, until just golden & fragrant, 4-5 minutes. Set aside.

IMG_3722

In same pan, toast the garlic cloves, shaking pan occasionally, about 7 minutes. Cool, peel, and chop.

Place basil in a large ziploc freezer bag, and use meat pounder or rolling pin to bruise all leaves.

IMG_3729

Combine nuts, garlic, basil, olive oil & salt in a food processor; process until smooth.

IMG_3735

Transfer mixture to a small bowl and mix in the Parmesan; add salt as needed to taste. Cover with plastic wrap and use within 3 days.

IMG_3739

It was so very, very good. As in, it’s all I can do to keep myself from running back out to the market and buying out their entire inventory of basil so I can make this by the bucketful. I was talking pesto with my mom prior to trying out the recipe, bemoaning how most jarred pestos tend to be overly oily at best, cloying in taste at worst. Not this pesto! Even the resident picky eater of the house liked it, and we happily slathered it on bread (Iggy’s Francese, of course) as snacks in between using it for meals. Next blog post: what we DID with the pesto! Get your food processors out and make some up so you can join in the fun!

Read Full Post »

What better way to kick off “The Spaghetti Capers” series here on The Hungry Crafter than with an old family recipe for that most enduring of Italian classics: spaghetti & meatballs. These are the meatballs of my childhood, the meatballs I dream of. The ultimate comfort food, embedded with a thousand memories.

Being a family recipe, the measurements are hardly precise, particularly for the meatballs. It’s been a “fiddle ’til perfect” type of recipe for me, as would be expected when the outcome you’re looking for is to reproduce a specific taste that you remember from being 5 years old. A good general rule of thumb I’ve discovered over the years is: more parmesan, less bread. It sounds so self-evident, but it’s really key.

First things first, though — get your sauce going. This last batch was truly fantastic, which I must credit in part to advice I received several years ago from my friend Peter. After I raved about a particular sauce he made, he pulled me aside and whispered in my ear, “The secret ingredient is time.” No, not thyme. Time. I let my rendition simmer for four hours, and I must say, I’m a big fan of the secret ingredient. While based on my grandmother’s sauce, I’ve made a few modifications to make this particular recipe uniquely mine! Here goes:

Jo’s Pasta Sauce

  • 1 good glop of olive oil
  • 1-2 shallots, diced
  • 2 bulbs fennel, diced
  • 3 carrots, diced
  • 3-4 cloves minced garlic (Or more if you like. I often do.)
  • 1 28-oz can crushed tomatoes
  • 1 28-oz can whole tomatoes, with juice, squashed by hand (Yes, squashed. Of course that’s a technical term.)
  • 1-2 parmesan cheese rinds
  • pat of butter
  • small handful basil leaves, chopped
  • salt, pepper, & fresh lemon juice to taste

Warm olive oil in a large saucepan or stockpot. Add shallot, fennel, and carrots and cook over medium-high heat until everything is soft and the shallots are translucent. Add garlic and let cook just another minute (garlic burns easily!), then add both cans of tomatoes. Bring to a slow boil, then turn heat to lowest setting, add parmesan rinds, and let the sauce simmer for a good long time while you make meatballs, read the mail, gab on the phone or what have you. Just prior to serving, remove the parmesan rind(s) with a pair of tongs and discard. If you are cooking for anyone picky (ahem), you can use an immersion blender to smooth out any chunks in the sauce at this time. Add a pat of butter and the basil leaves, then season to taste with salt, pepper & lemon juice (go light on the lemon — it’s as needed for acidity only).

Now what about those meatballs?

Farina Family Meatballs

  • 1 lb. hamburg
  • 1 egg
  • 2 good fistfuls of grated parmesan
  • a slightly lesser amount of breadcrumbs
  • handful of chopped fresh parsley (sub dried in a pinch, but really do try and use fresh)
  • handful of raisins
  • salt and pepper

You can see that this is a precise recipe indeed. Start by dumping all ingredients in a big bowl, except for the raisins. Here’s what my proportions looked like:

Mix ingredients together with your hands (stop as soon as it comes together; it’ll taste better if it’s not overmixed). If it seems too dry or bready, add a touch of milk and/or additional parmesan; if it’s too wet, add more breadcrumbs. Let this be your mantra: meaty cheesy, not bready goopy. When the consistency is where you like, add in raisins and mix with your hands.  Roll into balls.

Working in batches so as not to overcrowd the pan, brown your meatballs on all sides in a skillet with a little bit of olive oil.

Remove browned meatballs to a jelly roll pan and finish in a 350 degree oven for 20-30 minutes, or until cooked all the way through.

Carefully combine meatballs with your sauce and keep warm until ready to serve.

Now, to be fair and reasonable — this recipe should serve at least 4 people if served with a pound of pasta. Unless you are very hungry and gluttonous. (I, of course, know NO ONE like that!) In which case, remove yourself to the couch post haste, pull up a blanket, and proceed to moan and groan about how you ate too much for the next hour or so. It’s part of the family tradition.

Read Full Post »

IMG_3379
Have I mentioned that I love Italian food before? Yes? I have? Well, no surprise there. What is somewhat surprising is the fact that I’ve now been living in Boston for 17 years, and had never been to a single Italian festival in the historic North End. Until recently. (This is going somewhere good, can’t you tell?)

I’ll tell you all about the festival in just a moment, but I’m too excited about the feature part to wait… What’s important to know is that my recent visit to the North End planted a seed in my li’l noggin. I came home after the festival and nestled into my corner of the couch with a couple of my favorite Italian cookbooks. I’m fairly confident in my cooking when it comes to Italian food, making it a ripe area for me to focus on to take my cooking skills to the next level. Hmmm, I thought to myself, what if I were to cook nothing but Italian food for a solid month? Nate wouldn’t mind eating it. It would be good for my skills. I most certainly wouldn’t mind eating it…

On further thought, however, I realized that a). I have way more than a month’s worth of posts to dedicate to Italian food, b). this might not be the most diet-friendly decision to make, and c). um. It’s already halfway through the month. How did that happen? Where did September go? Instead, I decided to introduce an ongoing sub-series of Italian posts, scattered throughout my other blog posts, all to be filed under the umbrella of…. (drumroll, please):

Each post belonging to the series will be introduced with The Spaghetti Capers logo above, letting this investigation of Italian cooking continue on indefinitely. I hope you’ll join me for the adventure! First post to follow shortly.

Now back to the festival. Sunday, August 29th, we headed down to the North End for the final day of the three day Saint Anthony’s Feast. According to their website, the feast is the largest Italian religious festival in New England, and is now in its 91st year. The highlight of the feast is the ten hour procession of the statue of St. Anthony throughout the streets of the North End. Donations are pinned to St. Anthony–often by people leaning out of their second floor apartment windows–babies are kissed… It’s truly a spectacle.
IMG_3353
IMG_3346
The secondary highlight of the feast is, of course, the food. (Bless the Italians. Really.)
IMG_3305
All the classics were covered: spicy Italian sausages… (this photo’s for you, Dad!)
IMG_3313
pizzelles…
IMG_3315
Cannolis, filled to order…
IMG_3365

and plenty of tomatoes and basil.
IMG_3367
Myself, I was excited to try the zeppoli, which are basically a cross between a donut and fried dough. I’d read about them in some of my cookbooks, but never eaten any, and was not disappointed by the taste.
IMG_3372
This one kinda looks like a turtle, don’t you think?
IMG_3376
Oops, not anymore!
IMG_3377
They were sweet and hot and filling, so all I had room for next was a small calamari, olive, and celery salad — delicious!
IMG_3384
It was a brilliantly sunny day, and therefore hot, so after settling down on a curb to eat our snacks, we decided it was time to head home…after one last stop at Salumeria Italiana for some of that amazing prosciutto I originally discovered for my sister’s elopement, and a couple of snacks from Lyndell’s Bakery. More on the ensuing spaghetti capers from that detour at a later date, though (hint, hint)…

Read Full Post »